A couple of weeks ago, I tried to take a class at a bead shop, and miserably failed. It wasn't really anybody's fault, but it was a very upsetting experience. I spent about 80 dollars on class fees and materials, and came home with ZERO to show for it. The instructor didn't give me any instructions to take home and try at home, she had me working with a very difficult cord--Fireline, in extremely long lengths to try and make a leather wrapped bracelet. I got so upset 3/4 of the way through, I told her this type of stitching thread was too difficult for me to manage.
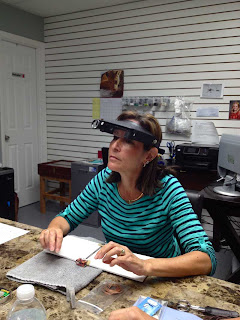
I came home, thought about it, and decided to try another shop that was offering a similar class. It was Donna's Beads on Beneva Road in Sarasota. What a difference! I paid for another class, but they let me bring my materials from the OTHER store and learn. There were TWO teachers for a very small class of five students, and we had fun and really enjoyed the experience. I had a hard time not laughing when the instructors put on their magnifying visors. They made me think of that character in the TV show Star Trek-- Geordi LaForge, who wears a special visor on the show. They were VERY patient, and checked in with us constantly to see how we were doing.
We used Fireline today, but much shorter lengths and with TWO beading needles while stitching the beads. We used 2 mm diameter leather cord, but a couple of gals said that 1.5 mm leather cord would be even better. Using two beading needles and shorter thread line (about two yards at a time) made all the difference in the world! I got started and very quickly started seeing results. They had a way of using an overhand knot to join new thread on the sides when you needed it, and making the the knot pull to the back of the bracelet for tying and weaving in later by tugging on the short ends.
And here is another view of the beginning with the knotted leather cord and button that starts your journey to the other end. I found my button at JoAnn's. There is another great place for buttons for these wrap bracelets on Etsy. The seller's name is Button Jones. :-) The best size for the button is from a 1/2" to 5/8", otherwise anything any bigger overpowers the beautiful beads and leather.
A very fine Japanese company--Miyuki--makes these tile beads that were used in our class today. They are called Tila beads. They are a little pricey...about 7 dollars in a bead store for a tube of about 100 beads. But they are very very beautiful and come in many iridescent colors and variations. The beads are expensive, but the holes and quality are very uniform. You get much prettier looking jewelry with nicer beads and they lay better as well.
I was really happy with how things went today, and had fun in the process...Yay! Now the trick is to finish off the bracelet at home, weave in the loose threads where I joined new Fireline, and post a photo!

Two crafty sisters, Lyle and Jeannie, wanting to remember their mom, Millie, who gave them their creative genes...A little about crafts, a lot about living life...Jeannie lives in SW Florida, Lyle lives in Michigan. Although miles apart in distance, we are a lot alike in spirit and love, we love to create things! Lyle has taken a back seat at the moment in the crafting department, but she'll be back one of these days!


Now, that's a very nice looking piece - congrats! I'm glad you tried again at a different store. I was thinking those would make good key chain fobs if you just put a "hook" on the other end. I'm looking forward to seeing what you make with this new skill. :)
ReplyDelete